
Blur Tutorial
I am by no means a photoshop expert but with all this quarantine time recently, I have had time to dive into photo editing a bit further and have been asked to do tutorials of some of my more in-depth edits, including the heavy blur edits that I do. These edits were just a result of me experimenting inside photoshop, combining some of the blur filters and layer masks. There are always multiple ways to achieve a certain look within photoshop and this is just the way I currently do them.
I utilized a Lightroom to Photoshop workflow, meaning I start my edits in Lightroom then export to Photoshop for the heavy edit, then close out that .psd file (making sure it is saved). Adobe will automatically load that .psd file back into Lightroom as a new image. For the blur effect I have been doing, it is helpful if there is some sort of terrain behind the aircraft like trees, clouds, or canyon walls….😏

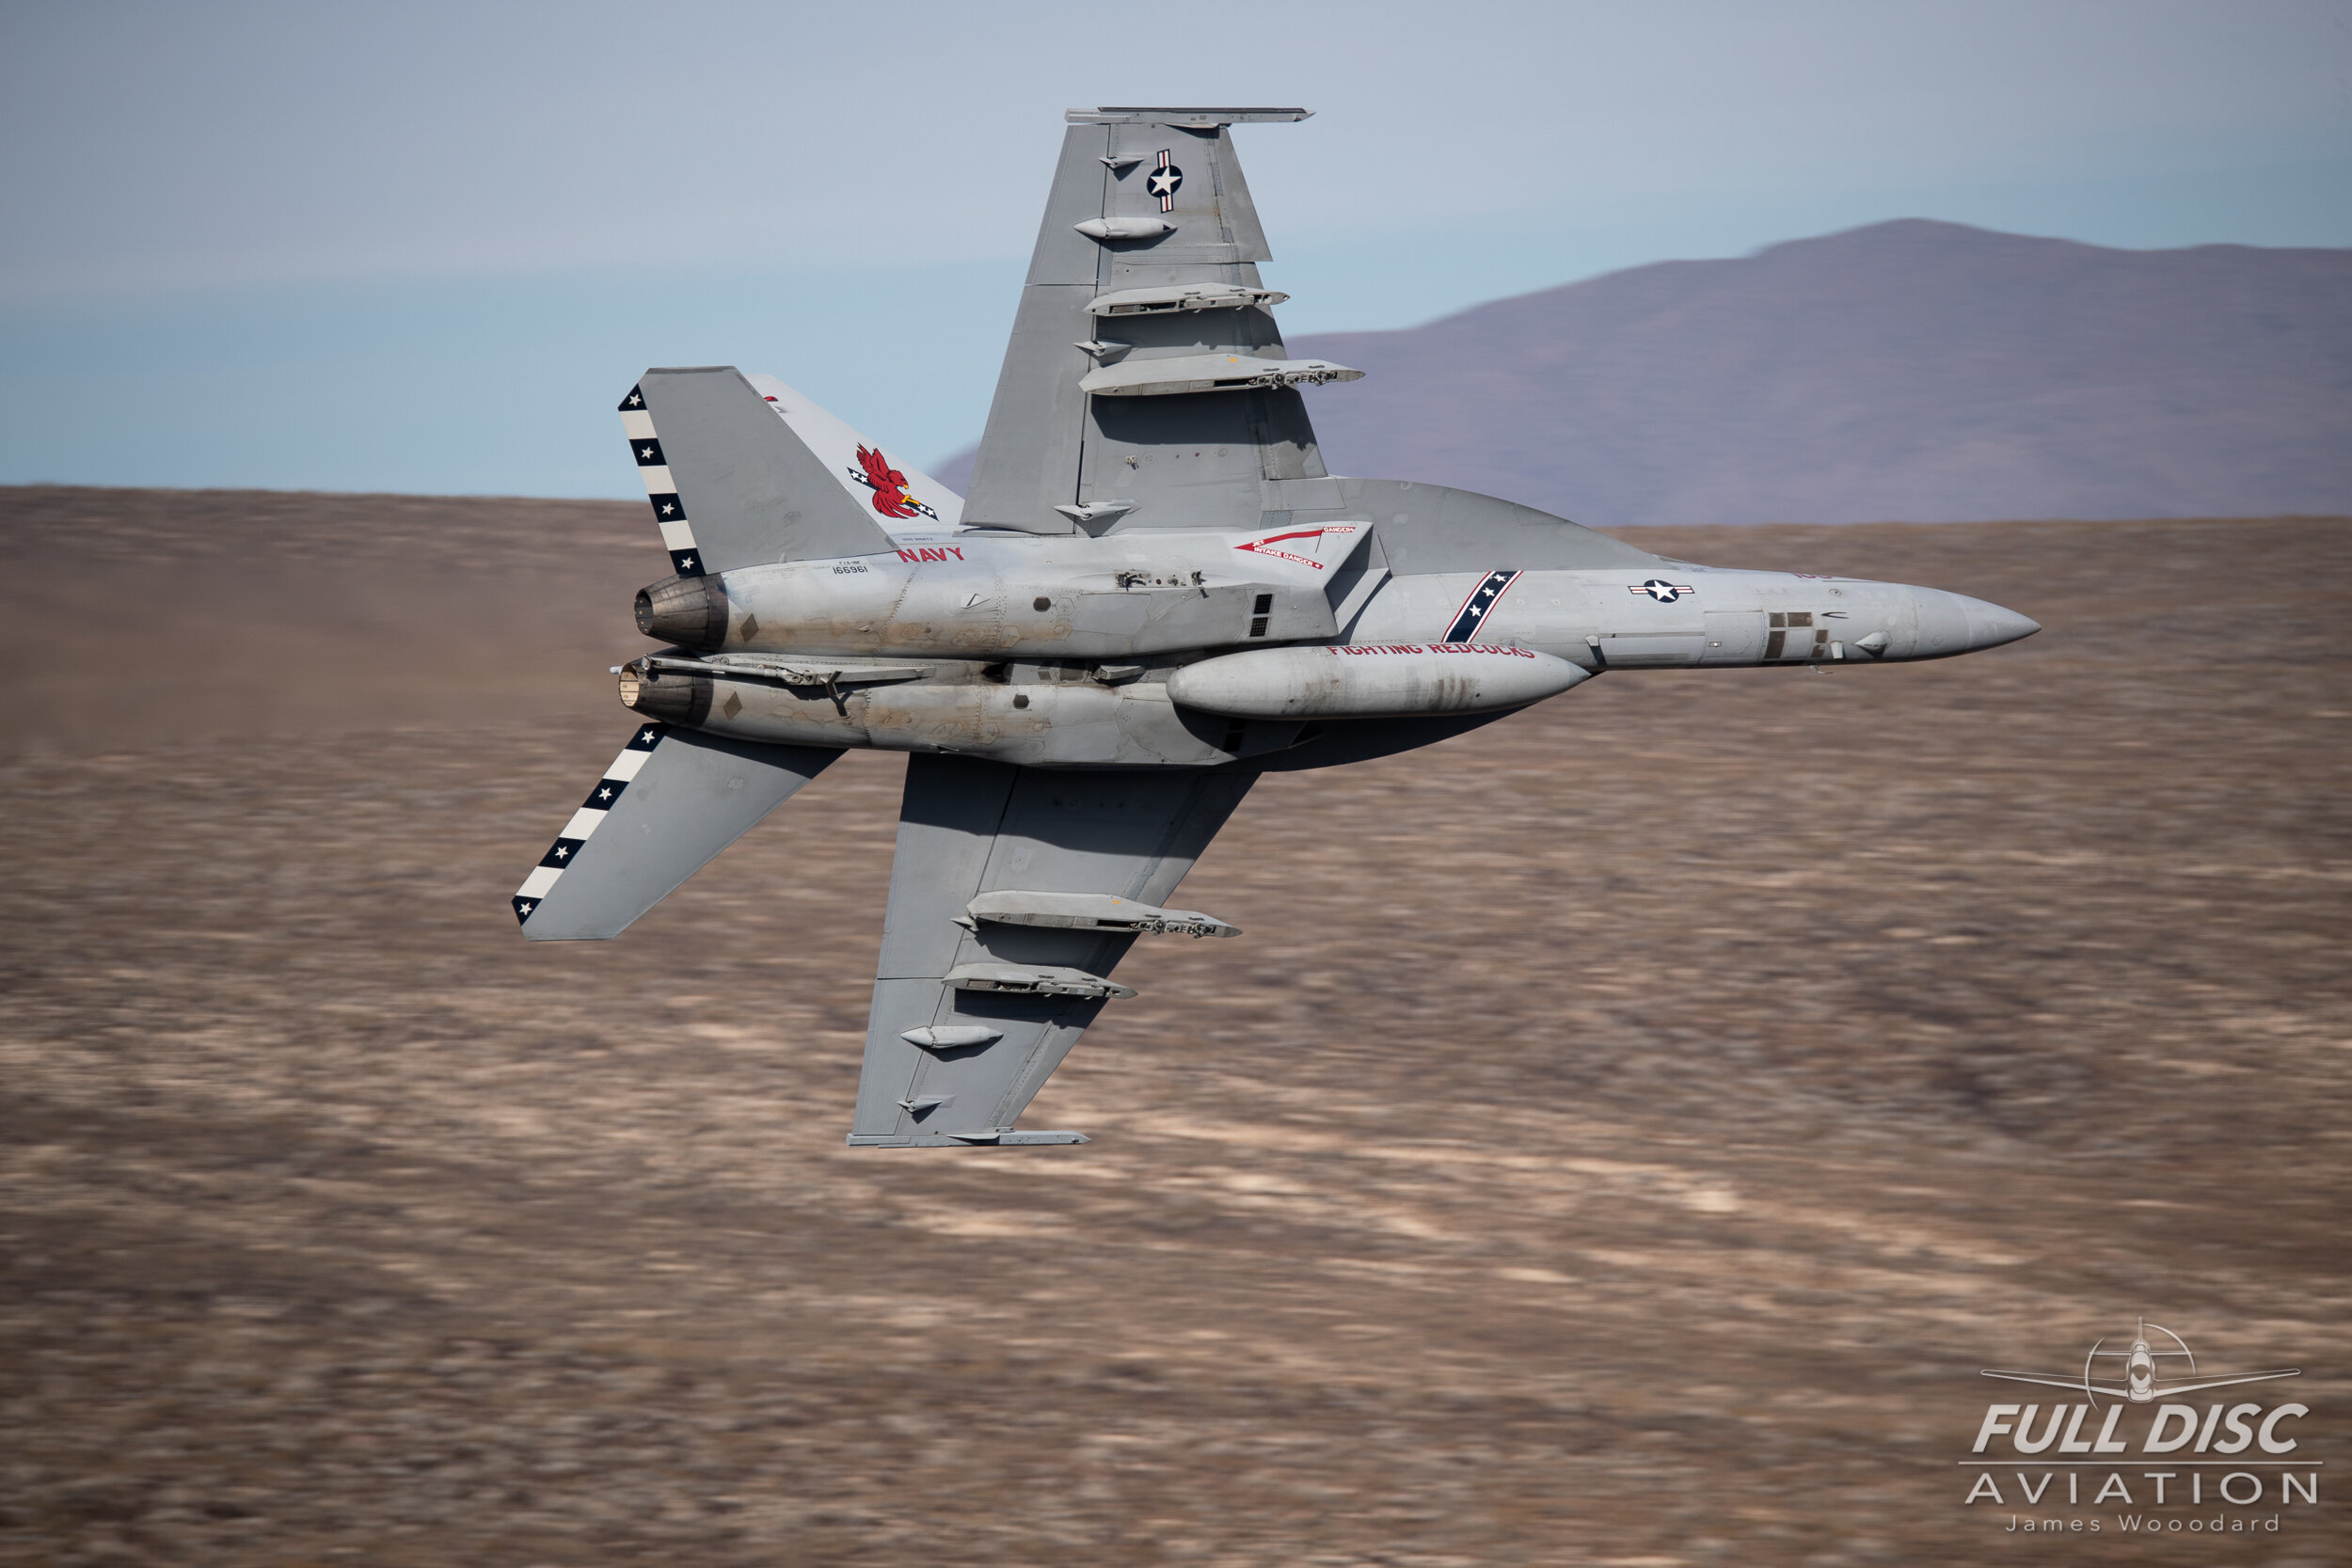
For the image I am going to do the tutorial for, I chose a low level shot that has some terrain behind the image. Here is the raw image before any LR editing. (all keyboard shortcuts I mention are for MAC)
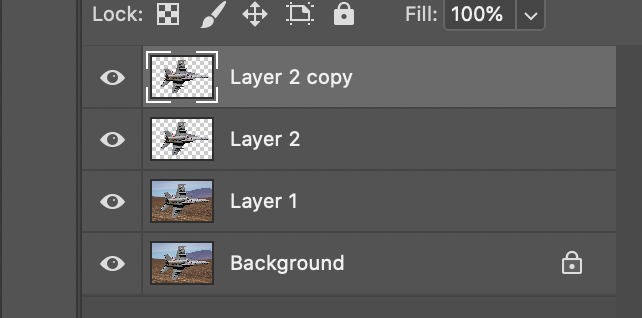
Next, we will open the image in PS from LR, but you can do whatever method works for you. Once inside PS, I DUPLICATE the background layer (command J). Your layers panel should look like this once complete.

With the top layer (Layer 1) selected, I will SELECT the aircraft. I start off with the OBJECT SELECTION TOOL, then modify the selection from there using the POLYGONAL SELECTION TOOL.

Object Selection Tool

Polygonal Select Tool

Using the OBJECT SELECTION TOOL, click and drag an area surrounding the object. In this case I went from the top left to the lower right.
MOST of the time, the OBJECT SELECTION TOOL does a decent job, but you will ultimately need to refine it a little. I use the POLYGONAL SELECT TOOL, pressing the “SHIFT” key with that tool selected ADDS to the selection, holding the “OPTION” key SUBTRACTS from the selection. This can be tedious work so be prepared for that. With the blurring effect I will be doing to the rear of the jet, it isn’t quite as critical to be as precise as I am in the front. Once the selection is made, I always save the selection in case I need to use it later on.

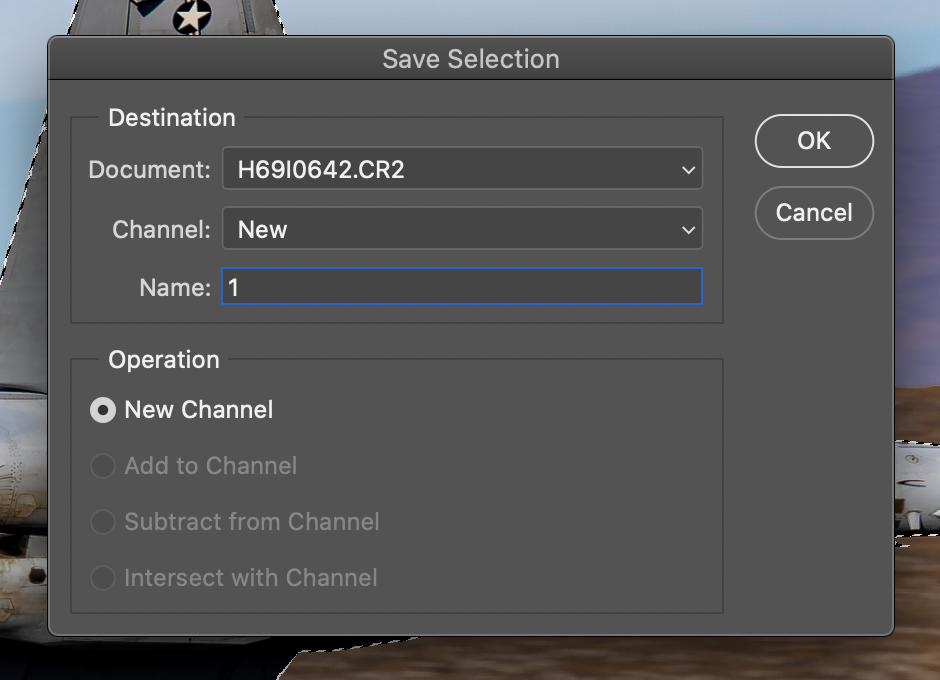
You will need to name the selection, be sure to save it to a NEW Channel as shown.
Once the selection is saved, I duplicate the selection twice by hitting “COMMAND J” twice while the selection is active. (I may not need the second one but if I need it, it will be there).
Now it is time to blur the background. With the duplicated full image (Layer 1) selected go to PATH BLUR under filters.


Inside the PATH BLUR window there are several options and sliders that you can choose from. By default “CENTERED BLUR” option is selected, for this tutorial that needs to be de selected. You will see a blue arrow over the image, this is showing the angle of the blur so adjust it as needed. Adjust the SPEED, TAPER and END POINT SPEED sliders to fit what you are looking for.


When you are happy with the way it looks, hit the OK button toward the top of the window. Depending on what your computer is doing in the background and the speed of you computer, this can take some time for photoshop to render the blur so you may have to wait a couple minutes.
Now we can fade the jet into the blur using a layer mask and the gradient paint tool. Make sure your jet layer is selected, and add a layer mask. To add the layer mask, hit the icon that is a white rectangle with a black circle in it, at the bottom of your layers panel.


Now that you have a layer mask, you can “fade” the jet. With a layer mask, anything that is white is visible, anything black becomes 100% transparent. So if we take the gradient fill tool from left to right, the rear of the jet will become transparent.

Be sure that the foreground and background colors are black and white as shown above. (It is the third icon up from the bottom)

With the gradient tool selected, click and drag over the image from the left to the right. You will probably need to try this several different times to get the desired effects you are looking for. The resulting image should look something like this.

From this point, I would close the image which would save the file, then automatically open it back up in LR for further editing. I hope you find this tutorial useful, if you have any questions please do not hesitate to send us a message. Cheers and happy editing.
